Mr. Heng ·
guides  | |
| |
Aircon Leaking Water? 5 Common Causes and How to Fix Them
Mr. Heng
Founder & Lead HVAC Technician
aircon leakingaircond water leakaircond repair
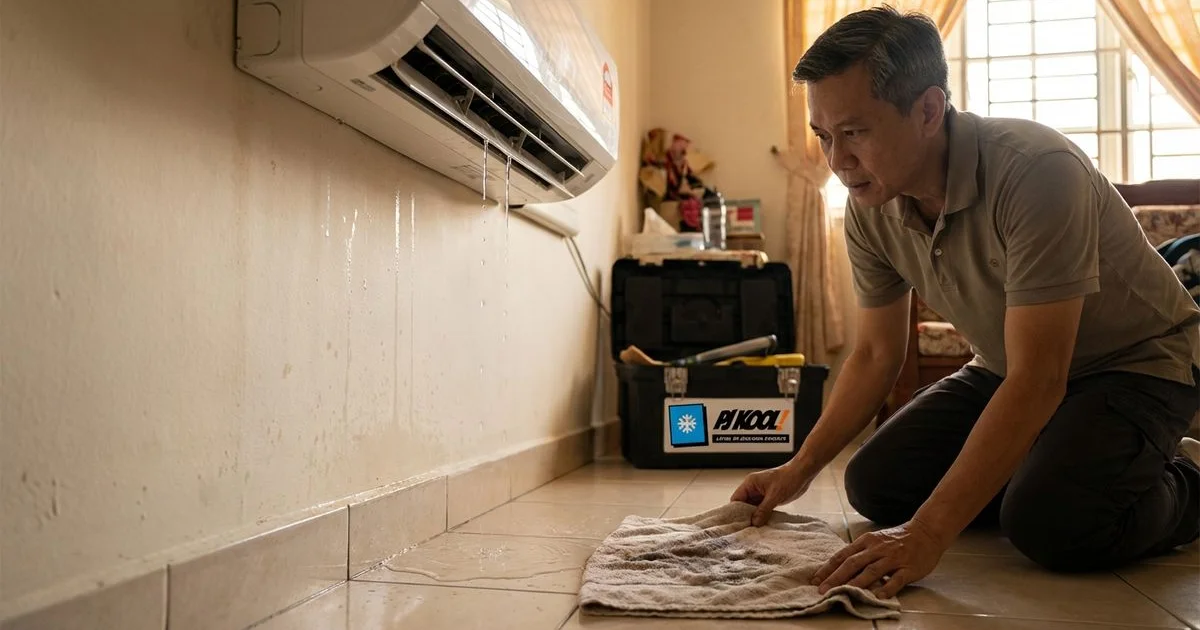
Some of the most frustrating moments in our work involve walking into a client’s home and seeing a bucket in the middle of the living room. Or worse, noticing that water has been silently running down a freshly painted wall for days. At PJ Kool, we see this constantly, and the damage often goes beyond a simple stain.
You know how it is in the Klang Valley; the humidity here doesn’t just make us sweat, it puts our air conditioners under immense pressure to remove moisture from the air. From what we’ve seen, that extra moisture is exactly why leaks are the number one complaint we receive.
Let’s look at the data, what it’s actually telling us, and then explore a few practical ways to respond.
Here are the five most common causes of water leaks and the specific fixes for each.
1. Blocked Drainage Pipe
This is the single most common cause of aircond leaks we encounter in Petaling Jaya and KL.
Your aircond produces a significant amount of water (condensate) as it cools the warm, humid air. This water is meant to flow through a drainage pipe and exit your home. When that pipe gets blocked, the water backs up and overflows from the indoor unit.
The “Jelly” Problem
Most people assume the blockage is just dust. In reality, it is usually a biofilm—a colony of bacteria and fungi that thrives in the dark, wet environment of your drain pipe.
This biofilm creates a thick, white or pinkish “jelly” that eventually forms a solid plug. In Malaysia’s tropical climate, this growth can block a standard 16mm drain pipe in just a few months.
Why It Gets Blocked:
- Biofilm and slime buildup caused by the interaction of dust and continuous moisture.
- Dust and dirt accumulation that turns into mud when wet.
- Insect nests, particularly from small wasps or ants near the outdoor drainage exit.
- Kinks or bends in the vinyl drainage hose that trap water and encourage algae growth.
How to Fix It:
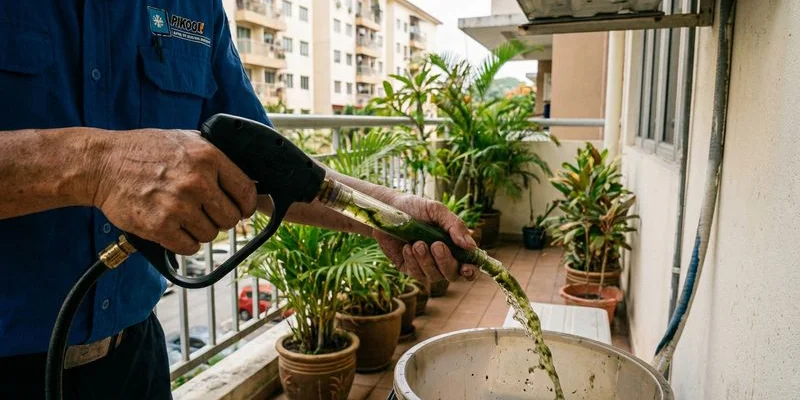
For a temporary DIY solution, use a wet/dry vacuum. Go to the outdoor end of the drainage pipe and suck the blockage out. This is often enough to get the water flowing again for a few weeks.
For a permanent fix, a technician needs to flush the pipe with a chemical solution to dissolve the biofilm completely. We include this drainage clearing with every chemical wash service because water flushing alone often leaves the sticky jelly behind.
2. Dirty Evaporator Coil
When the evaporator coil (the cold metal fins inside your unit) is covered in dirt, the water condensation cannot flow smoothly.
Instead of dripping into the tray, water droplets cling to the dirty fuzz on the coil. These droplets eventually become too heavy and drip off the edge of the coil, missing the drainage tray entirely.
Why It Happens:
- Extended service intervals (waiting longer than 6 months).
- Kitchen proximity, where grease particles mix with dust to form a sticky coating.
- Pet dander bypassing the plastic filters.
- Mould growth (often Aspergillus or Cladosporium) spreading across the damp coil surface.
How to Fix It:
You need to clean the coil deep between the fins. A standard “general service” often isn’t enough if the dirt is impacted deep inside. You likely need a Chemical Wash.
Here is a quick comparison to help you decide:
| Feature | General Service | Chemical Wash |
|---|---|---|
| Best For | Routine maintenance (every 3-4 months) | Leaking units or weak airflow |
| Process | Blower vacuum & filter cleaning | Alkaline solution foam cleaning |
| Effect on Leaks | unlikely to fix deep blockages | Highly effective for clearing coils & pipes |
| Typical Cost (1.0 HP) | RM 60 - RM 80 | RM 120 - RM 150 |
We recommend a chemical wash if you haven’t serviced the unit in over a year. The chemical solution dissolves the grime that water and soap cannot remove.
3. Cracked or Damaged Drainage Tray
The drainage tray sits underneath the cooling coil to catch the water. In older units, this component is a common failure point.
Most modern wall units use ABS plastic trays. Over time, these can:
- Crack from thermal stress due to constant expansion and contraction.
- Become brittle after 7-10 years of use.
- Corrode if you have an older model with a metal tray (common in some older commercial units).
How to Fix It:
You cannot patch a cracked tray reliably with glue or tape; the water will eventually find a way through.
The only durable solution is replacement. A new drainage tray typically costs between RM 50 and RM 150 depending on the brand (Daikin, Panasonic, and York parts vary in price). Your technician can swap this out during a standard service visit.
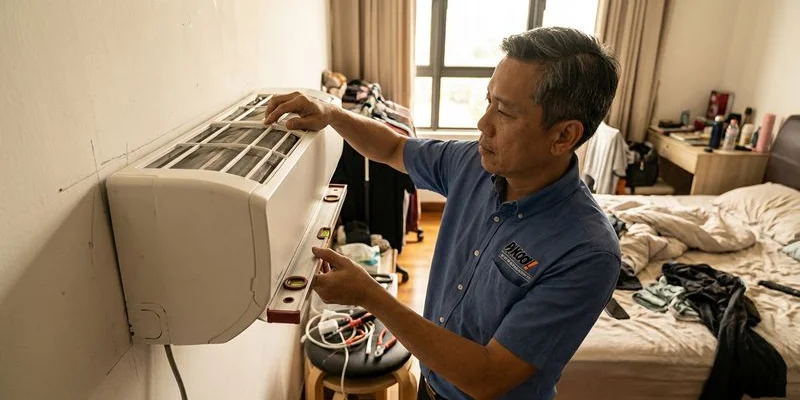
4. Improper Installation
If your aircond has leaked since day one, or if you notice water dripping down the wall behind the unit, the issue is likely installation.
Many “cowboy” contractors cut corners on materials or technique. The two biggest culprits we see are incorrect sloping and insufficient insulation.
The “Insulation Secret” (Armaflex)
In Malaysia, the standard insulation thickness for refrigerant pipes is often 3/8 inch (9mm). While this is cheaper, it is frequently too thin for our high humidity.
When the insulation is too thin, the cold copper pipe inside causes the outside of the foam to “sweat” (condensation). This water drips inside your trunking and down your wall.
We strongly recommend using 1/2 inch (13mm) insulation thickness (Class 1 or Class 0) for all residential installations in KL. It costs slightly more but prevents sweating permanently.
Common Installation Errors:
- Incorrect tilt angle: The indoor unit must slope slightly towards the drainage outlet (at least a 1cm drop for every meter of length).
- Uphill drainage routing: Water cannot flow uphill without a specialised pump.
- Loose connections: Drainage hoses that are merely taped together rather than clamped can slip off over time.
How to Fix It:
Installation issues require re-work. A technician may need to re-level the mounting plate or replace the piping insulation with thicker material.
5. Frozen Evaporator Coil
A frozen coil is a dramatic problem. You might see actual ice forming on the fins, or hear a crunching sound from the unit.
When this ice melts—usually after you turn the unit off—it releases a volume of water that overwhelms the drainage tray. The tray overflows, and you get a sudden flood.
Why It Happens:
- Low Refrigerant Gas: This causes the coil temperature to drop below freezing.
- Restricted Airflow: A dirty blower fan or filter stops warm air from passing over the coil, causing it to freeze.
How to Fix It:
- Turn off the unit immediately. Running it while frozen damages the compressor.
- Let the ice melt. Place towels on the floor; this will take 1-2 hours.
- Check the gas pressure. A technician needs to gauge the PSI.
Important Note: Gas in an aircond system is a closed loop. It does not get “used up” like petrol in a car. If your gas is low, you have a leak. Simply topping it up is a waste of money unless the leak is found and repaired.
Bonus: Condensation on the Unit Body
Sometimes, the unit isn’t broken. It’s just physics.
If you set your temperature to 18°C on a rainy day when the humidity is 90%, the plastic casing of your aircond will become very cold. Moisture from the room will condense on the outside of the unit, just like water droplets on a cold soda can.
You can reduce this by:
- Raising the temperature to 23°C or 24°C.
- Adjusting the fan speed to “Auto”.
- Improving the insulation around the unit if it is embedded in a false ceiling.
When to Call a Professional
While you can use a vacuum on the drain pipe yourself, most leaks involve internal components that are difficult to access.
You should call a technician if:
- Water is leaking from the back of the unit (indicating an installation or insulation flaw).
- The leak continues even after you have cleaned the filters.
- You see ice on the coils or copper pipes.
- You notice a musty smell accompanying the leak (a sign of mould).
Don’t Let a Small Leak Become a Big Problem
Water damage spreads fast. A small drip today often leads to:
- Mould growth on your plaster ceiling and walls.
- Parquet floor damage, causing wood to warp and rot.
- Electrical shorts if water travels near power sockets.
Get Your Leak Fixed Today
If your aircond is leaking water in PJ, KL, or anywhere in the Klang Valley, we are here to help.
WhatsApp us at 012-2252 623. Our technicians can diagnose the specific cause—whether it is a jelly blockage or thin insulation—and fix it properly.
Learn more about our aircond repair services.
Tags:
aircon leakingaircond water leakaircond repairaircond troubleshootingdrainage problem
Related Articles!
Need Professional Aircond Help?!
Don't guess — let our senior technicians diagnose and fix your aircond. WhatsApp us now!